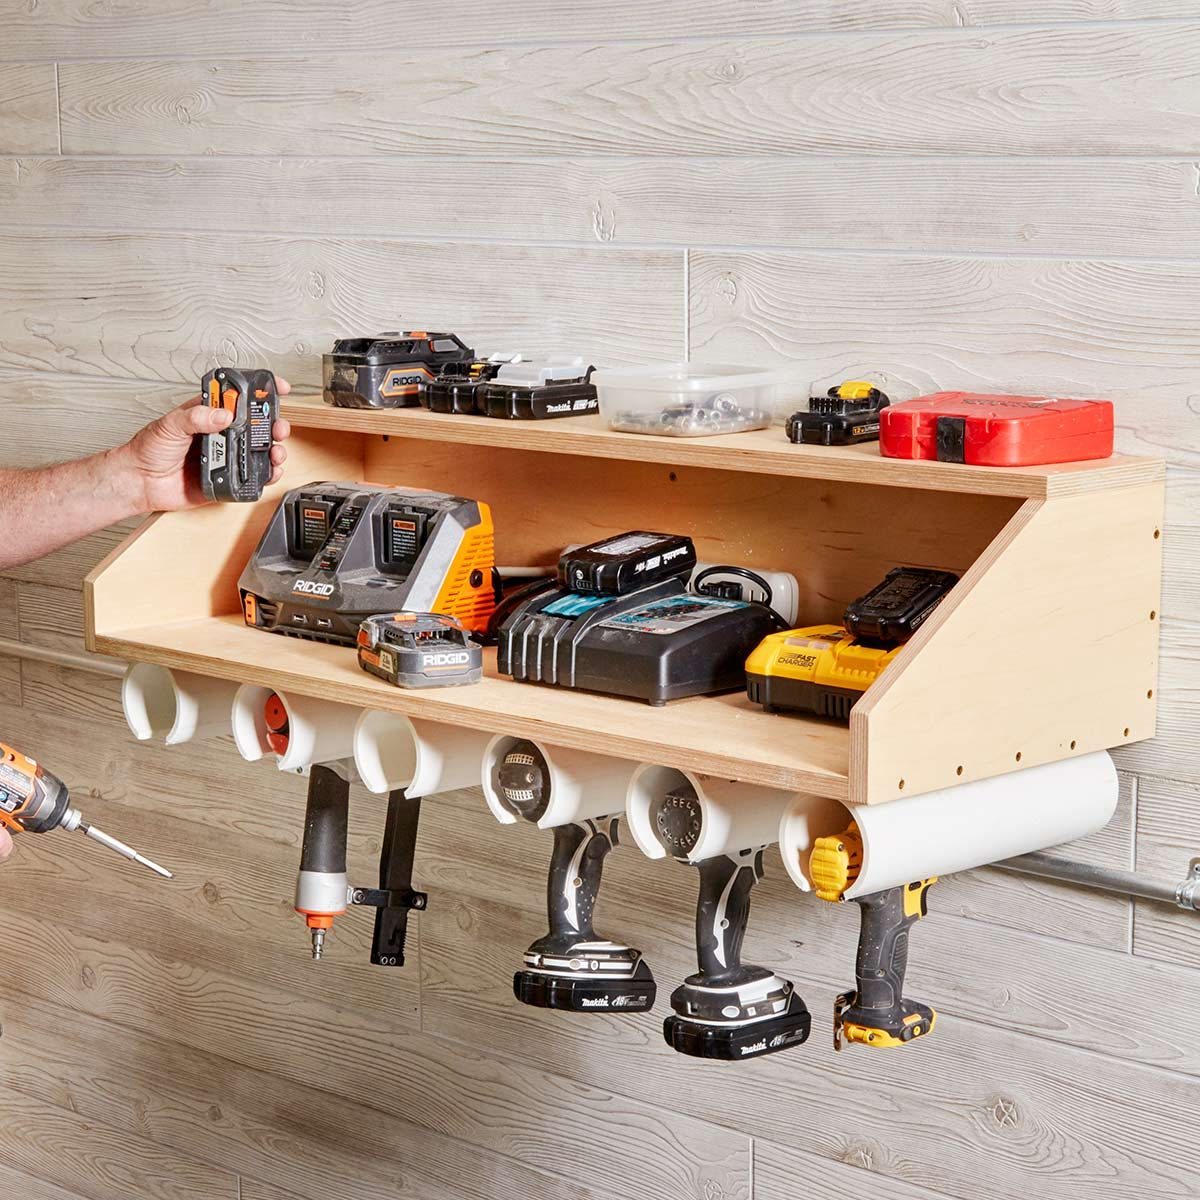
Making a PVC drill rack for your garage is an easy and inexpensive way to keep your workstation organized. With just a few materials and tools, you will never lose your cordless drills, drivers, chargers, and batteries to garage and workbench clutter. To create a PVC drill organizer for your garage workspace, just follow these easy steps:
- Gather materials and tools needed
- Cut PVC pipe to desired lengths
- Cut slots to fit drills and drivers
- Mount PVC to the underside of shelf
You can easily mount the PVC drill-holders to the underside of any wood shelving you have in your garage, or you can install your own shelving to accommodate the drill holders. The shelf above the DIY drill storage is a great place to store batteries, chargers, and other related tools and accessories.
Now let’s take a more detailed look at how to build your DIY garage drill dock.
Materials and Tools Needed for the DIY Garage Drill Rack
Here are the materials and tools you’ll need to complete this DIY project:
Materials
3” PVC pipe – The length is up to you, depending on how many drills you have to store. Figure a one-foot length for each drill.
Woodscrews – The size of the woodscrews depends on the width of the shelf you will be mounting the drill holders under. Make sure they are long enough to fasten the PVC securely to the wood shelf. You’ll need two screws for each drill holder.
Tools
- Clamp
- Jigsaw
- Circular saw
- Basic hand tools
- Measuring tape
- Sharpie
Steps for Making the PVC Drill Holder
Here are the steps that you need to make your DIY drill holder.
Step 1: Cut PVC. Cut your PVC pipe into 12” lengths. You’ll want one for each drill you plan to store. Keep in mind the length of the shelf you will be mounting the pipe to. You should plan to mount the PVC about 6” apart to make it easy to grab the tool you need without disturbing those adjacent to it.
Step 2: Measure, mark, and cut slots. Using your clamp, measure the width of the drills to be stored in the PVC pipe holders. This will allow you to determine how wide the slots need to be. It works best to make the slot about 1/8” wider than the handle. The length of the slot works best at about 5” for most drills. Mark the PVC where you will be cutting it, and then use the jigsaw to cut it. You will probably want to file the cut edges with sandpaper or a file to get rid of any sharp parts.
Step 3: Mount drill holders to the shelf. Drill holes in the PVC drill holders opposite the slot. You’ll want to fasten each holder to the shelf with at least two screws. This will ensure that the rack is strong enough to hold the drills securely. Now, mount the holders to the underside of the shelf you’re using.
Step 4: Load up your DIY drill storage rack. Secure your drills into the holders and place the chargers and batteries on the shelf. You may want to add a power strip to the shelf so you can easily charge batteries in the same place. Now you’re all organized with your cordless drills, drivers, and accessories.
This idea was courtesy of Family Handyman. For more detailed steps and images, you can visit FamilyHandyman.com.
Organize Your Garage with a DIY Drill Dock
Making your own drill rack for your garage has some great advantages. Not only does it help remove clutter and keep things organized, it takes advantage of the space under a shelf that you wouldn’t typically use, clearing up other space for you to use. Doing the project yourself also saves money. The materials that you need for the drill rack (PVC and woodscrews) are inexpensive and easy to find. With a small amount of money and time, you’ll have an effective and efficient drill storage area.
If you like this project and want to try others for organizing your garage, take a look at the easy instructions for an Overhead Garage Storage, an Overhead Clamp Rack, and a Fishing Rod Organizer.

