Are you working on a project involving PVC and wondering how to glue your pipes and fittings together? We’ll discuss selecting the proper glue, steps in preparing your piping or fittings, steps to glue the pvc materials together, and additional tips to make the process easy!
When Would You Need to Glue PVC Pipe?
PVC piping was once used almost exclusively for building homes and commercial buildings, and it’s still a necessary product for construction. In recent years, crafters and DIYers have found that they can create a wide number of things with PVC, from furniture to outdoor games, and even wine racks. While simply fitting PVC pipes and fittings together can create a strong hold for some items, like custom curtain rods or a floating basketball hoop, glue will be needed to connect PVC and fittings in construction and plumbing applications, as well as DIY projects that will get a lot of use.
Types of Glue
PVC Cement
When you need to connect PVC to PVC fittings, then PVC cement is the best product to give you a strong seal and connection. Unlike the glue we use for art projects that simply holds two items together, PVC cement, used in conjunction with a primer, actually causes a chemical reaction that melts a thin layer of PVC temporarily. Once the two pieces are joined together, the melted layer resolidifies, creating a waterproof, airtight seal.
Color Coded Cement
Because PVC is used in a broad range of applications, there are different PVC cements to match your projects, each with its own color coding. For example, blue labels contain quick setting cement, while orange should be used in colder environments. Be sure to check the uses of the color-coded PVC cement before purchasing it as it will say on the can.
CPVC Cement
CPVC has many of the same properties as PVC pipe, but the chemical makeup is different. Because the glue will create a chemical reaction to melt and bond the pipe, it’s important to choose the right glue for the right applications. While the process to glue the pipe may be the same, if you are working with CPVC, you’ll need to purchase CPVC cement.
Alternative Adhesives
PVC Cement will provide the strongest seal, which is ideal for plumbing, construction, and DIY projects like furniture building, but for other uses, that may not be necessary. Thread seal tape, for example, is easy and safe to use, with very little mess. Just wrap it around the male end of the pipe several times and insert into the fitting. Joint compound, or pipe dope, is a liquid that fills gaps to prevent leakage. It doesn’t dry and can be unscrewed at any time. Both thread seal tape and joint compound are compatible with PVC pipe.
For any type of application that is plumbing-specific, PVC Cement is the only product recommended.
Steps for Gluing PVC
Pipe Preparation
1. Measure
Ensure that you have the correct length of pipe to extend between the fittings. Mark the pipe so you’ll know where to cut it. Ensure you compensate for the additional length that will be inserted or screwed into your fittings if applicable.
2. Cut
To cleanly and safely cut your PVC pipe, set up a vice, guide, or clamp to hold the pipe in place. Line up the pipe so that your marking hangs off the table a couple of inches. Then cut it on the marking using a handsaw, hacksaw, or PVC pipe cutter.
3. Deburr
Now that your pipe is cut, you’ll notice some jagged burrs along the rim of the PVC. These will need to be removed before you attach the pipe to the fitting. Using a utility knife, gently cut the burrs away. Sometimes a file can be used to quickly smooth the edges.
4. Dry Fit
Once the PVC cement has been applied, you won’t have much time to make adjustments. That’s why it’s important to dry fit your pipes first, to ensure they fit properly. Arrange and fit all of your pipes and fittings together to check measurements and make changes as needed.
5. Mark the Pipe for Alignment
When you begin to glue your pieces together, it can be challenging to remember what direction the fittings go or how they should be positioned. While your PVC is connected with a dry fit, use a marker to draw a line from the bottom of the fitting to the top of the pipe. You’ll use these to align them again once the glue is applied.
Gluing Your Pipe
1. Prepare your Space
Once you begin to glue your PVC, you’ll need to work quickly so be sure to set up the space before you open the primer and cement. The process can be messy, so you should lay a drop cloth beneath the project area to catch the solution as it drips. For safety, set up your work area in a well-ventilated space, and wear gloves and protective eyewear, as well.
Note, sometimes you’ll be gluing where the pipes are being installed and have less control over your gluing area. Drop cloth’s can be helpful here as well.
2. Coat with Primer
Using the primer’s built-in brush, apply a one-inch band of primer around the top exterior of the pipe, rotating the brush around the pipe three times. Then, do the same on the inside of the pipe. You’ll have about 10 seconds to apply the cement before the primer dries.
3. Apply the Cement
Just as you did with the primer, use the built-in brush to apply a one-inch band of cement around the top exterior of the pipe, rotating around the pipe three times. Then, do the same on the inside of the pipe.
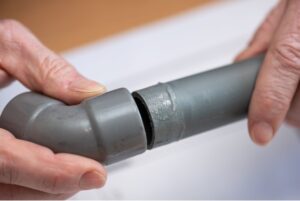
4. Connect and Twist
This is where the markings you made earlier come into play. Insert your PVC into the fitting, but do not align the markings yet. Instead, start with the lines about a quarter turn apart. Then twist to line up the markings on the PVC pipe and fitting. The twisting action helps activate the cement as well as ensure even coverage between the fittings / pipes. Hold the pipe in place for 30 seconds to allow the cement to cure enough to hold in place.
Helpful Tips to Remember
• Be sure to use the right type of cement.
The cement is able to form such a strong bond because of the chemical reaction it creates. If you choose a cement that is not designed for PVC, you may not get a tight seal on your PVC connections. If you plan to use the PVC in plumbing or building applications, double check the color coding on the cement to be sure it’s right for your job.
• Work quickly.
The primer and cement dry very fast, so you only have about 10 seconds to apply and insert the pipe. That’s why it’s so important to be prepared before you start the process. If, however, the primer or cement dries before you can connect the pipe, you’ll need to reapply.
• Allow enough cure time.
Holding the pipe in place for 30 seconds after gluing allows the primer and cement to dry. However, it’s best to wait at least 20 minutes after the pipes have been connected to handle the pipe further. Some products may even recommend a 24 hour wait time for the seal to cure.